Az Adblock, amely nem működik a Twitchen, nagyobb valószínűséggel történik, ha elavult Adblock böngészőbővítményt használ. További okok lehetnek a Chrome hálózati szolgáltatása, a böngészőlejátszó, az Adblock kiterjesztés szűrőinek nem optimális beállítása, a böngésző problémái vagy a böngészőbővítmény problémái.

Az adblokkoló böngészőbővítmények olyan szoftverek, amelyek képesek eltávolítani vagy módosítani az internetes hirdetést egy webböngészőben / alkalmazásban. De ezek a bővítmények néha nem tudják blokkolni a Twitch hirdetéseit, mivel a Twitch közvetlenül a falba helyezte a hirdetést.
A Twitch-hirdetések blokkolásának módja a következő:
1. megoldás: Győződjön meg arról, hogy az AdBlock kiterjesztése naprakész
A technológia napról napra fejlődik, és ha nem frissíti rendszeresen a böngésző kiterjesztéseit, akkor sok bajba kerülhet. Tehát, ha elavult AdBlock kiterjesztést használ, akkor előfordulhat, hogy az adott bővítmény nem tudja blokkolni a Twitch hirdetéseit. Szemléltetés céljából a Google Chrome-ot a telepített AdBlock kiterjesztéssel fogjuk használni.
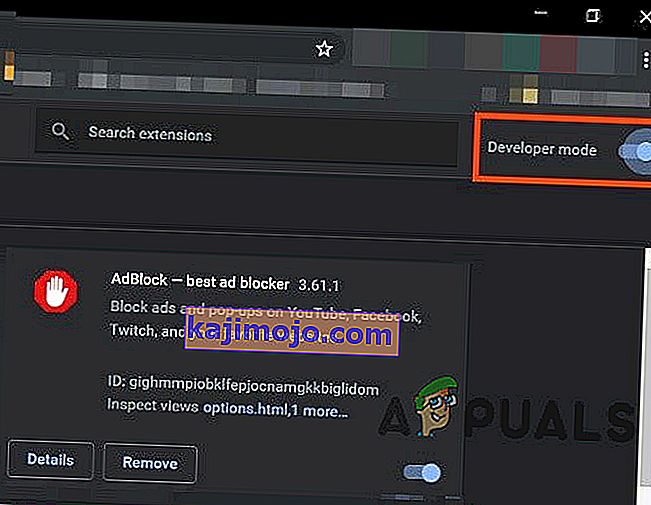
- Nyissa meg a Chrome & címet a címsávba
chrome: // kiterjesztések
és nyomja meg az Enter billentyűt.

- A bővítmények Windows Toggle a „ Developer Mode ”, hogy On .
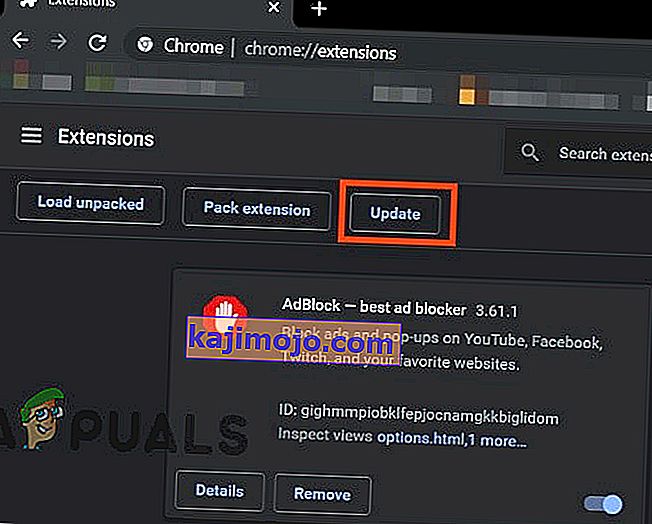
- Most kattintson a „ frissítés ” gombra , amely frissíti a Google Chrome összes bővítményét.
- Indítsa újra a böngészőt.
- Nyissa meg a Twitch-et, hogy megnézze, megoldódott-e a probléma.


Ha a Twitch hirdetései még mindig ott vannak, akkor lépjen a következő megoldásra.
2. megoldás: Engedélyezze a Böngésző kiterjesztés beállításait
Számos AdBlock-bővítmény azonnal elkezd blokkolni a hirdetéseket, miután hozzáadta őket a böngészőhöz, de külön beállítással rendelkezik a hirdetések Twitch általi vezérléséhez, és ez a beállítás alapértelmezés szerint nincs engedélyezve, és engedélyeznie kell a hirdetések letiltását a Twitchen. Tehát a beállítás engedélyezése megoldhatja a problémát. A Google Chrome-ot és az AdBlock-ot szemléltetési célokra fogjuk használni.
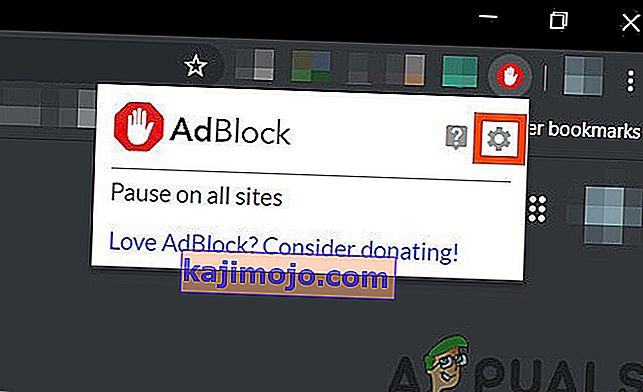
- Nyissa meg a Chrome-ot, és kattintson a címsáv végén található „ AdBlock ” ikonra. A bővítményre vonatkozó utasítások ettől eltérhetnek.
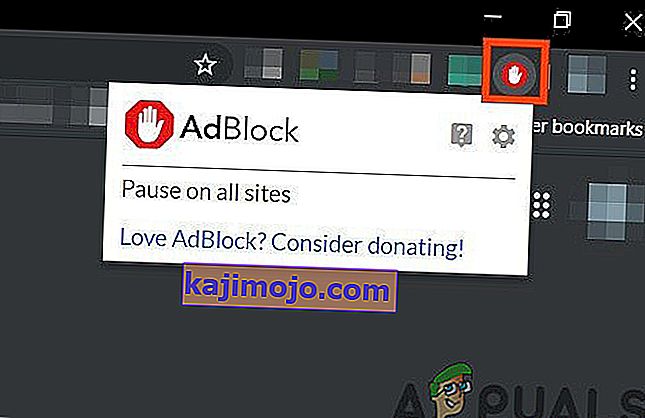
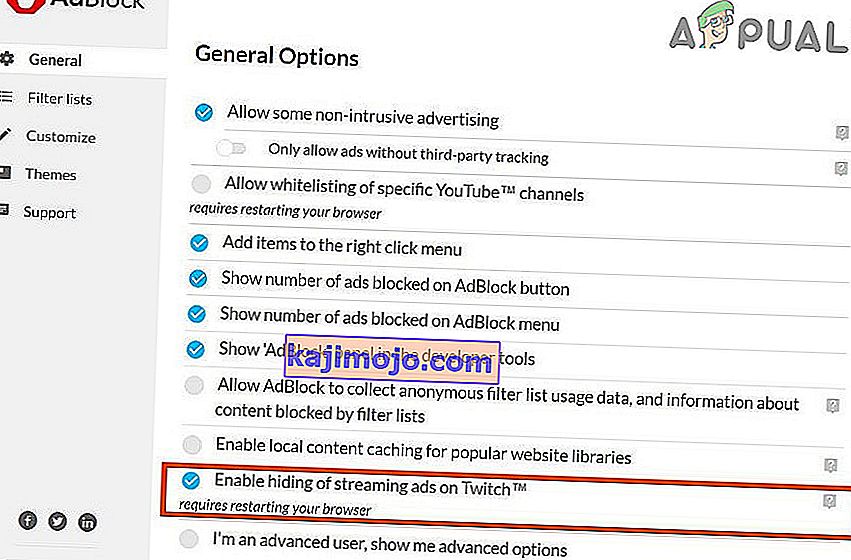
- Most kattintson az előugró menü „ fogaskerék ” ikonjára az „ AdBlock Settings ” megnyitásához .
- Az „ Általános ” beállítások a „ AdBlock Settings ” pipa „ Enable elrejtését Streaming hirdetések a Twitch ” opciót.
- Indítsa újra a Google Chrome-ot.
- Ellenőrizze, hogy a Twitch hirdetései blokkolva vannak-e.


Ha még mindig a Twitch hirdetéseivel néz szembe, akkor folytassa a következő megoldással.
3. megoldás: Módosítsa a speciális beállításokat a Chrome-ban
A Chrome szolgáltatás hálózati szolgáltatása külön folyamatot futtat, amely nem érhető el a Google Chrome-hoz hozzáadott hirdetésblokkoló bővítmények számára. A probléma megoldódhat, ha ezt a szolgáltatást hozzáférhetővé teszi a hirdetésblokkoló bővítmény számára.
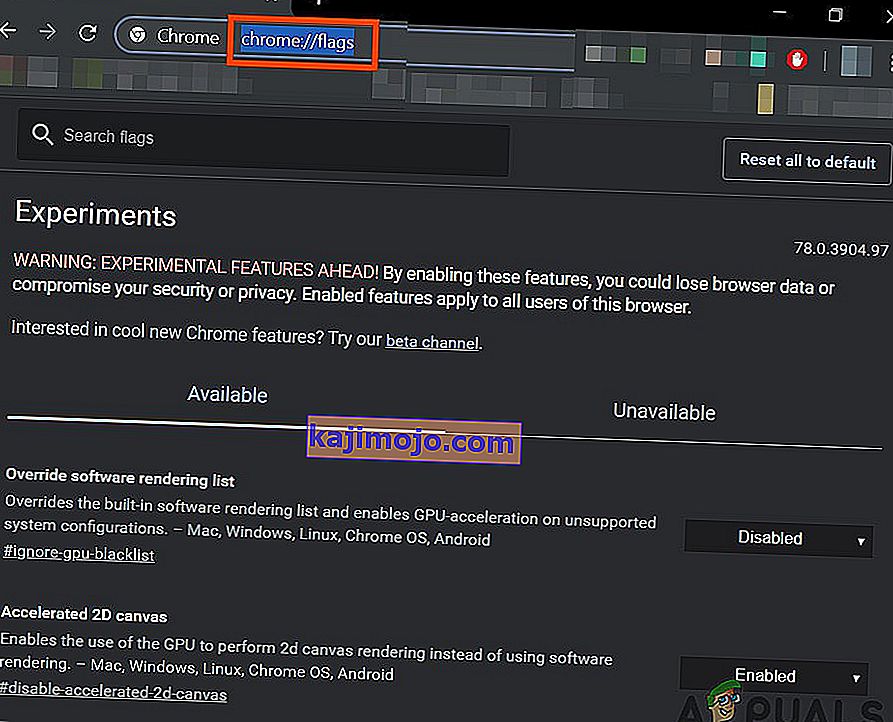
- Nyissa meg a Chrome-ot és a címsávba
króm: // zászlók
és nyomja meg az Enter billentyűt.
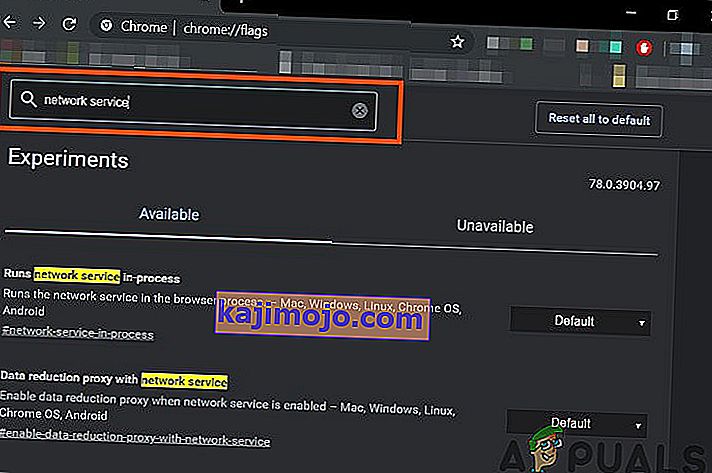
- Most a Search Flags mezőbe írja be a „ Network Service ” kifejezést.
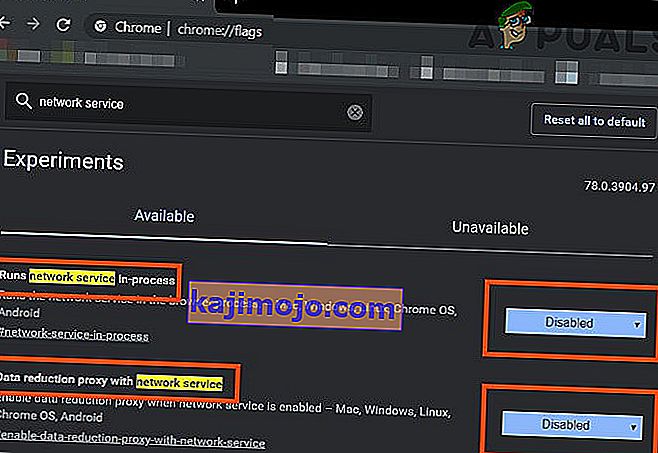
- Az eredményekben állítsa a „ Futtatja a hálózati szolgáltatást folyamatban ” és az „Adatcsökkentő proxy hálózati szolgáltatással” beállítást „ Letiltva ” értékre, és mentse a módosításokat.
- Indítsa újra a böngészőt.
- Ellenőrizze, hogy a probléma megoldódott-e. Ha a probléma megoldódott, ne felejtse el végrehajtani ezeket a lépéseket, amikor a Chrome új frissítést kap.


Ha a probléma továbbra is fennáll, próbálkozzon a következő megoldással.
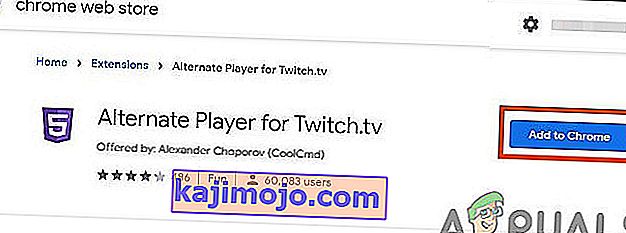
4. megoldás: Próbálja ki az Alternate Player alkalmazást a Twitch.tv fájlhoz
A Twitch.tv korábban Alternatív lejátszó kiterjesztése, amelyet korábban Twitch 5 néven ismertek, eltávolítja a legtöbb hirdetést az élő közvetítésekből. A lejátszó beállításait az internetkapcsolatra lehet hangolni. Ez lehetővé teszi, hogy továbbra is nézze meg az adást egy másik lejátszóban, például a Media Player Classic, a VLC Media Player vagy az MX Player stb., Ami miatt ez nagyon hasznos.
Tehát használata megoldhatja a problémát.
- Nyissa meg a megfelelő linket a bővítmény hozzáadásához a böngészőhöz.
- Adja hozzá a Alternatív lejátszót a Twitchhez a Chrome-hoz
- Add Alternate Player for Twitch a Firefoxhoz és a Firefoxból származó böngészőkhöz:
- Add hozzá az Alternate Player for Twitch alkalmazást a Microsoft Edge-hez.
- Adja hozzá a kiterjesztést a böngészőhöz.
- Indítsa újra a böngészőt, és nyissa meg a Twitch programot, hogy lássa, megoldódott-e a probléma.

Ha még mindig hirdetésekkel bombázzák, akkor lépjen a következő megoldásra.
5. megoldás: Használja a Szűrőket
Minden AdBlock kiterjesztéshez tartozik szűrő lista. A Szűrők listája lehet fehér lista, feketelista és egyéni lista. Ezek a listák manuálisan hozzáadhatók, vagy hivatkozhatnak online elérhető listákra. Hozzáadhatjuk a Twitch hirdetések folyamát a bővítmény feketelistájához, és ez a kiegészítés megoldhatja a problémát.
- Nyissa meg a Chrome-ot, és kattintson az AdBlock kiterjesztésre.
- Ezután kattintson a fogaskerék ikonra az AdBlock beállítások megnyitásához .
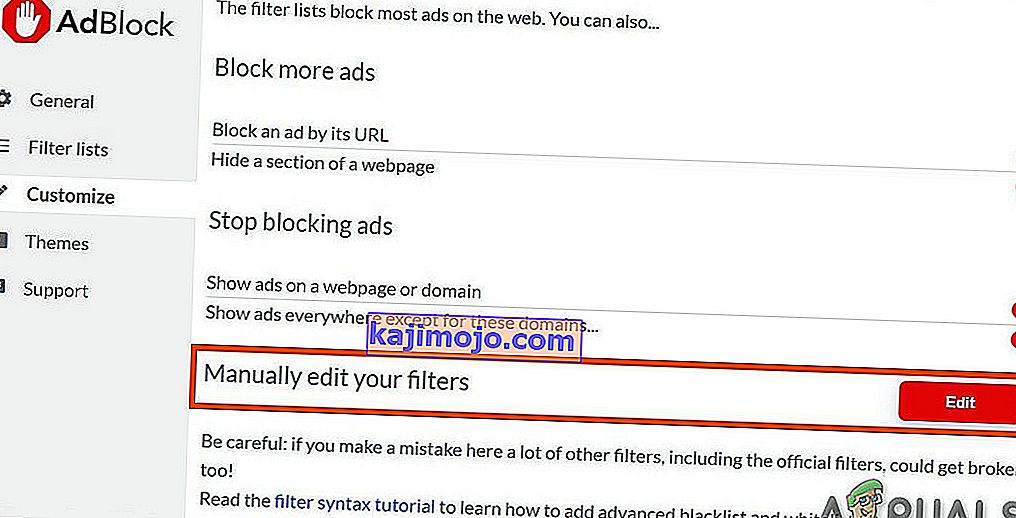
- Kattintson a „ Testreszabás ” gombra.
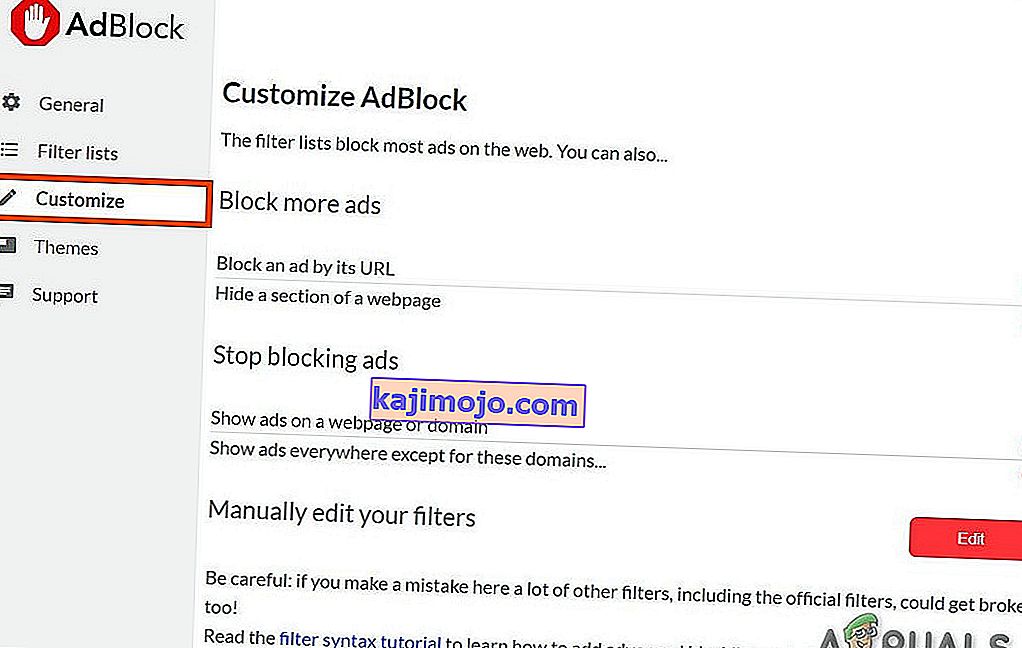
- Kattintson a „ Szerkesztés ” gombra a „ Szűrők kézi szerkesztése ” cím mellett.
- Adja hozzá a következőket a listához, mindegyik sorhoz egyet.


www.twitch.tv ##. js-player-ad-overlay.player-ad-overlay www.twitch.tv ##. player-ad-overlay.player-overlay //imasdk.googleapis.com/js/sdkloader/ ima3.js r /// imasdk.googleapis.com/js/sdkloader/ima3.js
Most nyissa meg a Twitch-et, és nézze meg, hogy a probléma megoldódott-e, ha nem, lépjen a következő megoldásra.
6. megoldás: Kerülő megoldás Android-eszközön
Twitch is not only available for the web but it has its Android app as well. There is a small workaround that can be performed to avoid the ads on the Twitch Android app. Remember that you can use an Android Emulator e.g. BlueStacks on the PC if you want to use the solution.
- Open Twitch on the Android
- When an ad starts to display then just click on “Learn More”
- And then immediately tap on Back Button and the whole ad will be skipped.
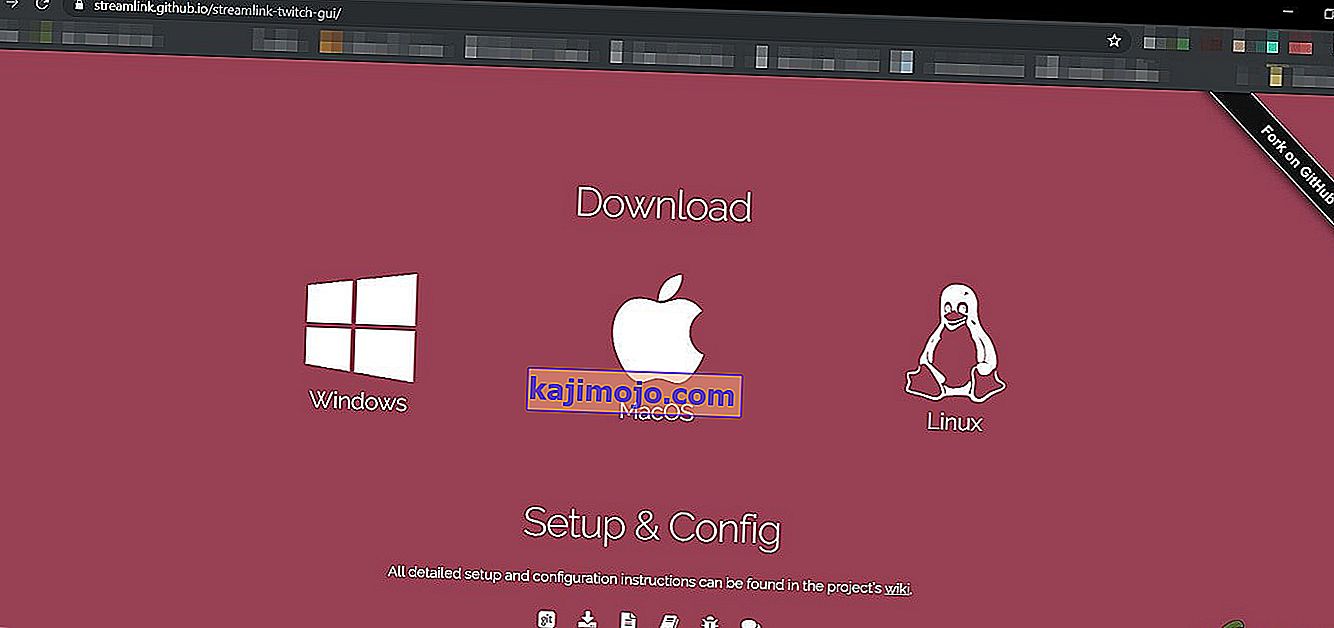
Solution 7: Use Streamlink
Streamlink Twitch GUI is a web application written in JavaScript (EmberJS), HTML (Handlebars) and CSS (LessCSS) and is being run by a Node.js powered version of Chromium. With Streamlink Twitch GUI you’re not dependent on the web browser of system and streams can be watched in any video player as per your liking, which will enable smooth video playback. Moreover, Streamlink Twitch bypasses any ad by the Twitch.tv.
- Download Streamlink as per your OS.
- Install & run it and see if the problem is solved.

If you are still in the line of ads, move to the next solution.
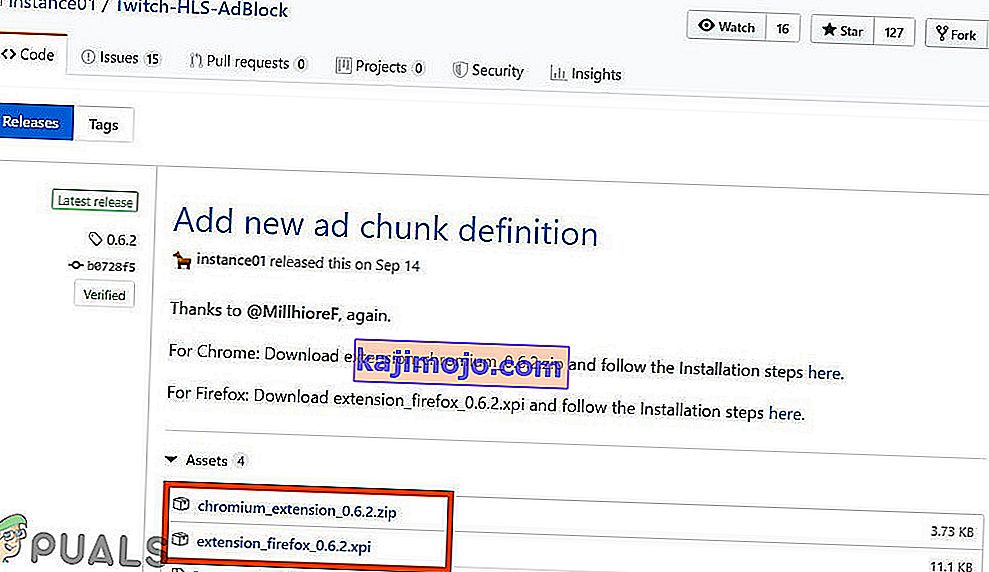
Solution 8: Using HLS AdBlock
Twitch plays advertisements whenever the user starts watching a new channel. Twitch staff injects advertisements into the HLS stream directly. HLS AdBlock extension patches the technique which Twitch uses and edits the m3u8 playlist that is requested every few seconds to simply remove segments that are marked as advertisements. So, installing HLS AdBlock can solve the problem.
- Download the HLS AdBlock extension as per your browser.
- For Chrome

- Unzip into a folder, remember the folder path.
- Go to
chrome://extensions/
and enable Developer Mode.
- Click on ‘Load unpacked’ and go to the directory with the extension (see if “manifest.json” is in the directory)
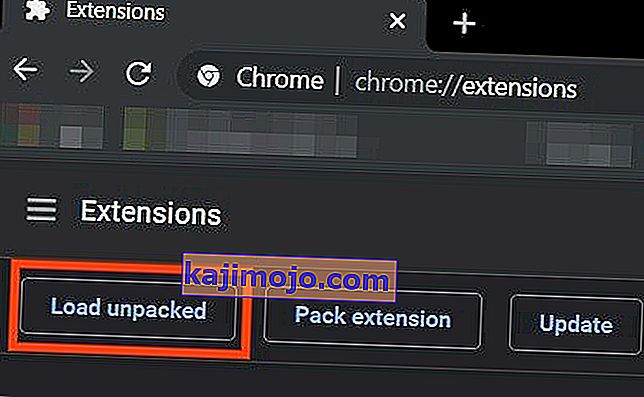
- Click on ‘Load unpacked’ and go to the directory with the extension (see if “manifest.json” is in the directory)

- For Firefox:
- Download the latest release (xpi file)
- Go to
about:addons
& load the HLS AdBlock addon from the downloaded file
- Now Run the Twitch to see if the problem is solved.
If you are still facing the problem, move to the next solution.
Solution 9: Use Adguard
AdGuard is an ad-blocking extension that effectively blocks all types of ads on all web pages including video ads, rich media advertising, unwanted pop-ups, banners and text ads, etc. AdGuard can handle most of the AdBlock circumvention scripts, the technique used by Twitch.
- Visit this link for Chrome and this link for Firefox.

- Install and run it.
- Check if the problem is solved.

If not, move to the next solution.
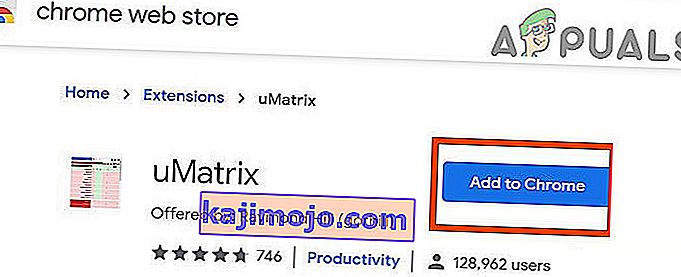
Solution 10: Using uMatrix
By uMatrix you point & click to allow or restrict requests made by the browser. It can be used to block iframes, scripts, ads, etc. uMatrix puts you in control of the connection, downloading and execution of data types.
- Visit the following link as per your browser to add the extension
- Add to Chrome
- Add to Firefox
- Run Twitch to see if the problem is solved.

If the problem is still there, proceed to the next solution.
Solution 11: Ublock Origin
Ublock origin is an efficient ad blocker that is easy on memory and CPU and can load & enforce thousands of filters than other popular blockers. It’s more of an “adblocker” as it can also create filters from host files.
- Visit the concerned link as per your browser to add the extension to it.
- Add to Chrome
- Add to Firefox.

- Run Twitch and see if the problem is solved.

If the problem persists, move to the next solution.
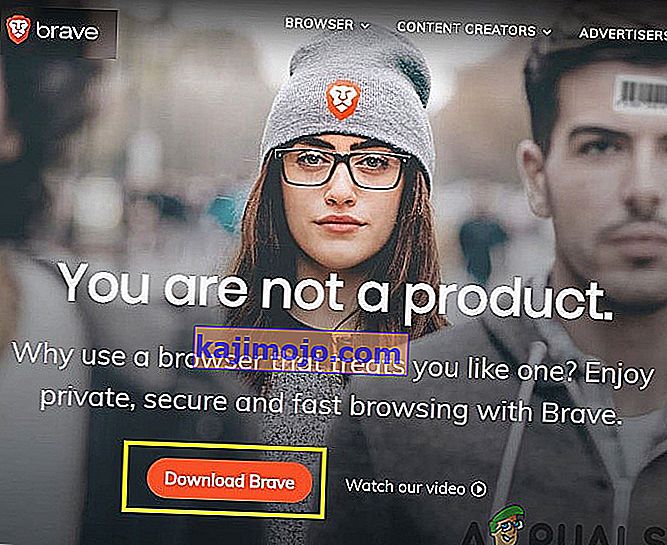
Solution 12: Use Brave Browser
Brave is an open-source& free web browser developed by Brave Software, Inc. Brave is based on the Chromium web browser. The browser blocks website trackers & ads.
- Download the Brave Browser.
- Install and run it.
- As Brave is Chromium-based so Chrome extensions can be used with it. Use any of the extensions mentioned in the above solutions.
- Now use Brave to access Twitch and see if the problem is solved.

If the problem is not solved, move to the next solution.
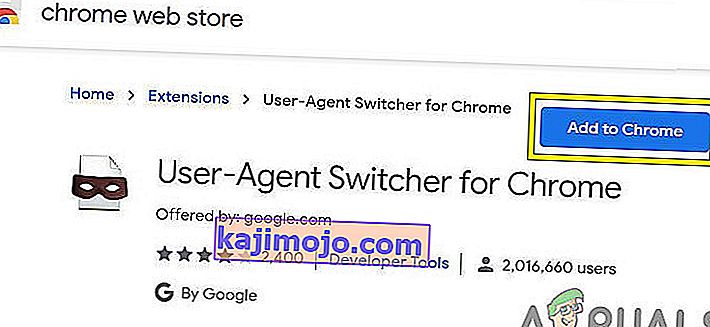
Solution 13: User-Agent Switcher
In this solution, we will use the same technique as mentioned for android users but with a different approach. We will use a Chrome extension User-Agent Switcher, by which we will convert the user agent in Brave Browser to be Android or iOS. And this may solve the problem. But before proceeding further, make sure you have Brave Browser installed with Ublock origin and Umatrix extensions added to it, which is explained in the above solutions.
- Open Brave Browser.
- Open User-Agent Switcher in Brave Browser to open it in the Chrome Webstore.
- Please read this help article on How can I add extensions to Brave and use these guidelines to add User-Agent Switcher to Brave Browser.
- Now click on the icon of User-Agent Switcher, next to the address bar, and then click on Android (if you want to switch to Android).
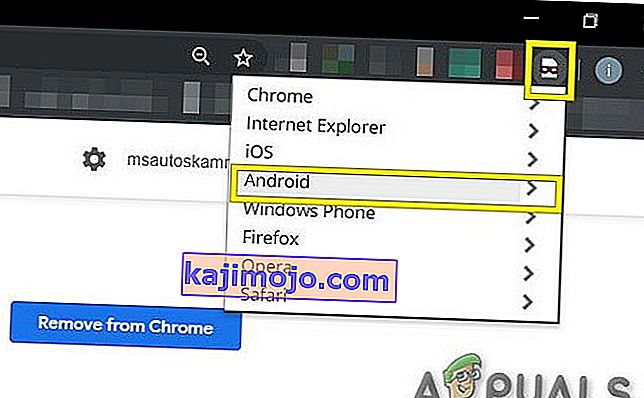
- Now open the Twitch in the Brave Browser, if an ad pops up, click on Learn More and then click on the back button and the ad will be skipped. Now you can switch back to Chrome in the User-Agent Switcher.


If the problem is not solved, proceed to the next solution.
Solution 14: Twitch Turbo:
If you hate ads during watching streaming and can afford to pay the fee then Twitch’s subscription service called Twitch Turbo is a good option to consider. Twitch Turbo comes with ad-free Twitch viewing with other features as well.
- Open Twitch Turbo Subscription Page to subscribe to the Twitch Turbo.

- Use Twitch Turbo to watch Twitch and there will be no ads anymore.

Hopefully, you can now watch Twitch without ads.