A „ Kezeletlen win32 kivétel történt az * alkalmazásnév * -ban ” hiba általában akkor fordul elő, amikor a felhasználó megpróbál elindítani egy olyan alkalmazást, amely a Visual Studio alkalmazásban készült. Ennek a hibának a legtöbb jelentett előfordulása az Uplay-hez, az Internet Explorerhez és több eredetileg régebbi Windows-verzióhoz készült Legacy játékhoz kapcsolódik.

Megjegyzés : Így javíthatja a Visual C ++ alkalmazáshoz kapcsolódó futásidejű könyvtárat.
Mi okozza a „kezeletlen kivétel történt az alkalmazásban” hibát Windows rendszeren?
Ennek a problémának számos egyszerű oka van, és a probléma hatékonyan kezelhető, ha képes felismerni a forgatókönyvet egyszerűen a helyes ok azonosítása alapján. Nézze meg az alábbi listát:
- Lehetséges, hogy a vírusirtó vétkes - Néhány víruskereső eszköz, például a Panda Antivirus okozta ezt a problémát, ezért mindenképpen cserélje ki őket.
- Bizonyos programok vagy rosszindulatú programok futhatnak - Ha telepített program vagy rosszindulatú program fut a számítógépén, érdemes megszabadulnia tőle. Győződjön meg róla, hogy tiszta rendszert indít, hogy meggyőződjön arról, hogy ez a helyes ok.
- A Microsoft .NET-keretrendszer telepítése sérült - Ha az alapfájljai sérültek, megpróbálhatja javítani a telepítést, telepíteni egy újabb verziót vagy végrehajtani egy SFC-vizsgálatot.
- A szkriptek hibakeresését a rendszerleíró adatbázis engedélyezi - Mint kiderült, egy adott rendszerleíró kulcs hozzájárulhat a probléma megjelenéséhez. A gondozásához le kell tiltania a szkriptek hibakeresését a rendszerleíró adatbázis kulcsain keresztül.
- Hozzáférés megsértése az Msvcr92.dll fájlban - A forráspuffer túllépése vagy a nem megfelelő végső bájt szintén a probléma lehetséges okai. Megoldásukhoz telepíteni kell minden függőben lévő Windows-frissítést.
- Az Ubisoft launcher rendszerleíró kulcsának törlése - Ha ezt a hibát látja az Uplay.exe elindításakor, annak oka az Ubisoft Game Launcher hibája. Ezt a problémát a nyilvántartáson keresztül is meg lehet oldani, törölve az indítóhoz tartozó értéket.
- Rendszerfájlok sérülése - A rendszerfájlok következetlensége is létrehozhatja ezt a problémát. A könnyű korrupció egyszerű DISM és SFC vizsgálatokkal megoldható. Súlyosabb körülmények között a tiszta telepítés vagy a javítás telepítése segít a probléma megoldásában.
1. megoldás: Telepítse az összes függőben lévő Windows Update alkalmazást
Az egyik leggyakoribb ok, amely végül a „ Kezelt Win32 kivétel történt ” hibát okozza, egy olyan alkalmazás, amelyet az x64 platformhoz készítettek az MSVCR90.DLL segítségével, és végül meghívja az strncpy függvényt.
Ebben az esetben az Msvcr92.DLL fájlban kiváltott hozzáférési megsértés valószínűleg az alkalmazás leállítását végzi az strncpy függvényben. A forráspuffer túllépése vagy a nem megfelelő végső bájt okozza a probléma legvalószínűbb okát.
Szerencsére a Microsoft már tisztában van ezzel a problémával, és kiadott egy gyorsjavítást a problémához, amely automatikusan megoldja azt. Ennek kihasználásához mindössze annyit kell tennie, hogy frissíti az operációs rendszer verzióját a legújabb elérhető verzióra.
Megjegyzés: Ez a gyorsjavítás a Visual Studio 2008 verziójában került beépítésre, amelyet a Windows automatikusan frissít, ezért az alábbi lépések univerzálisak, és az operációs rendszer verziójától függetlenül működniük kell.
Itt található egy gyors útmutató a Windows build legújabb verziójára történő frissítéséről a Visual Studio 2008 gyorsjavításának telepítéséhez és a probléma megoldásához:
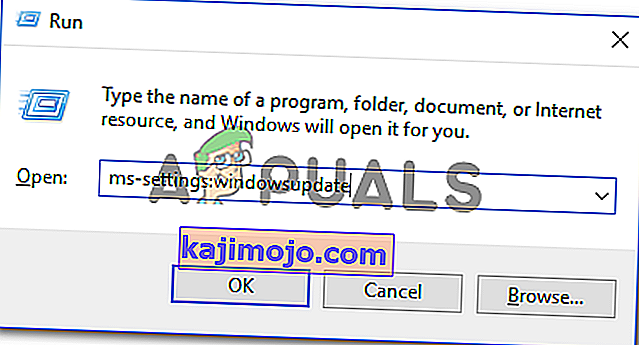
- A Futtatás párbeszédpanel megnyitásához nyomja meg a Windows billentyűt + R. Ezután írja be az "ms-settings: windowsupdate" parancsot, és nyomja meg az Enter billentyűt a Beállítások alkalmazás Windows frissítés lapjának megnyitásához .
Megjegyzés: Ha ezzel a problémával találkozik a Windows 7 vagy a Windows 8.1 rendszeren. használja helyette a 'wuapp' parancsot.
- Miután sikerült elérnie a Windows Update képernyőt, először kattintson a Frissítések keresése gombra . Ezután kezdje el követni a képernyőn megjelenő utasításokat a Windows frissítés telepítésének befejezéséhez , amely jelenleg telepítésre vár.

Megjegyzés: Ne feledje, hogy elengedhetetlen, hogy minden frissítést telepítsen, ne csak a kritikusakat. Mivel a gyorsjavítást a Visual Studio verziója tartalmazza, előfordulhat, hogy a kérdéses frissítést az Opcionális részben találja meg, ezért feltétlenül telepítse mindegyiket.
- Abban az esetben, ha az újraindítást kéri, mielőtt lehetősége nyílna minden elérhető frissítés telepítésére, tegye meg. De mindenképpen térjen vissza ugyanarra a képernyőre, miután a következő indítás befejeződött, hogy befejezze a többi frissítés telepítését.
- Miután minden függőben lévő frissítés telepítve van, indítsa újra a számítógépet egy utolsó alkalommal, majd ismételje meg a hibaüzenetet korábban kiváltó műveletet, hogy lássa, megoldódott-e a probléma.


Abban az esetben, ha továbbra is a „ kezeletlen win32 kivétel történt ” hibával találkozik, lépjen az alábbi következő módszerre.
2. megoldás: Cserélje ki az antivírust
Az ingyenes víruskereső eszközök nagyon hasznosak lehetnek, és elvégezhetik a munkájukat, hogy megvédjék a számítógépet, de néha egyszerűen nem értenek jól más dolgokkal a számítógépen. Fontolja meg az antivírus cseréjét, ha ez bekapcsoláskor okozza ezt a problémát!
- Kattintson a Start menüre, és a kereséssel nyissa meg a Vezérlőpultot . Alternatív megoldásként kattintson a fogaskerék ikonra a beállítások megnyitásához, ha Windows 10 rendszert használ.
- A Vezérlőpulton válassza a Nézet másként - Kategória elemet a jobb felső sarokban, majd kattintson a Program eltávolítása elemre a Programok részben.

- Ha a Beállítások alkalmazást használja, az Alkalmazások gombra kattintva azonnal megnyílik a számítógépére telepített összes program listája.
- Keresse meg a víruskereső eszközt a Vezérlőpulton vagy a Beállításokban, és kattintson az Eltávolítás gombra .
- Meg kell nyitnia az eltávolító varázslót, ezért kövesse az utasításokat az eltávolításához.

- Kattintson az Befejezés gombra, amikor az eltávolító befejezi a folyamatot, és indítsa újra a számítógépet, hogy ellenőrizze, továbbra is megjelennek-e hibák. Győződjön meg arról, hogy jobb víruskereső lehetőséget választott .
3. megoldás: Az Indító rendszerleíró adatbázis törlése (ha van)
Ha az „ Uplay.exe vagy egy másik, a Ubisofthoz tartozó alkalmazás elindításakor „ egy kezeletlen Win32 kivétel történt ”hibával találkozik, az valószínűleg az Ubisoft Game Launcher hibáját okozza.
Mint kiderült, ez széles körben elterjedt problémának tűnik a Windows 10 rendszeren, különösen azok között a felhasználók körében, akikre a Steam és az Uplay egyaránt telepítve van.
Számos érintett felhasználó, akinek a problémájának megoldásával küzdünk, a Rendszerleíróadatbázis-szerkesztő használatával meg tudta oldani azt, hogy megtalálja az indítóhoz tartozó karakterlánc-értéket és törölje azt. Ez állítólag kiküszöböli a konfliktust, lehetővé téve mindkét alkalmazás megfelelő működését ugyanazon gép alatt.
Itt egy gyors útmutató az Uplay indítóhoz társított beállításjegyzék törléséről:
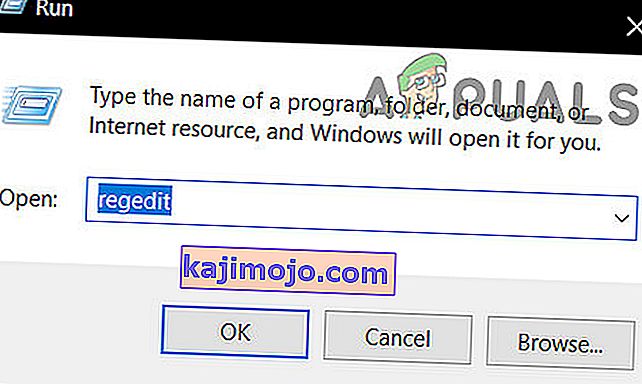
- A Futtatás párbeszédpanel megnyitásához nyomja meg a Windows billentyűt + R. A szövegmezőbe írja be a „regedit” parancsot, és nyomja meg az Enter billentyűt a Rendszerleíróadatbázis-szerkesztő megnyitásához . Amikor az UAC (Felhasználói fiókok felügyelete) parancs kéri, írja be az Igen parancsot adminisztrátori jogosultságok megadásához.
- Once you’re inside the Registry Editor, use the left-hand side section of the window to navigate to the following location:
Computer\HKEY_LOCAL_MACHINE\SOFTWARE\WOW6432Node\Ubisoft
Note: You can either navigate there manually or you can paste the location directly into the navigation bar at the top and press Enter to get there instantly.
- After you manage to land in the correct location, move down to the right-hand section of the screen, right-click on Launcher and choose to Delete to get rid of it.

Note: In case you can delete the key, here’s how to take ownership of registry keys.
Note: After you delete it, the launcher will be forced to create a new Launcher string value with fresh data, which should resolve the issue.
- Once the key has been deleted, close Registry Editor and restart your computer.
- At the next computer startup, repeat the action that was previously causing the “An unhandled win32 exception occurred‘ error and see if the problem is resolved.


In case the same issue is persisting, move down to the next potential fix below.
Solution 4: Reset Internet Explorer (if applicable)
Another potential instance with the potential of creating this issue is a series of corrupted Internet Explorer (IE). If you’re encountering the “An unhandled win32 exception occurred in iexplore.exe’ error chances are it appears after a failing script.
To fix this issue, you should reset your Internet Explorer settings via the Internet Options menu. This operation was confirmed to be successful by a lot of users that were dealing with this error.
Here’s a quick guide on resetting Internet Explorer in order to resolve the “An unhandled win32 exception occurred‘ error:
- Ensure that Internet Explorer, Edge or any other associated instance is turned off and no background process is running.
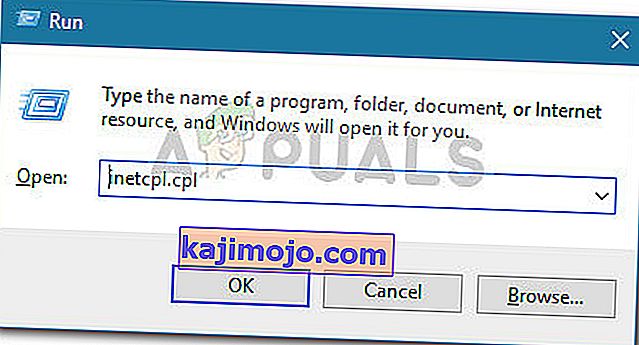
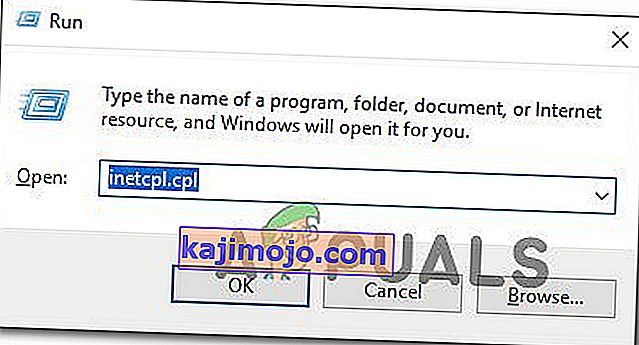
- Press Windows key + R to open up a Run dialog box. Inside the text box, type ‘inetcpl.cpl’ and press Enter to open up the Internet Options menu.
Note: If you are prompted by the UAC (User Account Control), click Yes to grant administrative privileges.
- After you manage to get inside the Internet Properties screen, select the Advanced tab from the horizontal menu at the top. Next, go to the Reset Internet Explorersettings and click on the Reset button.
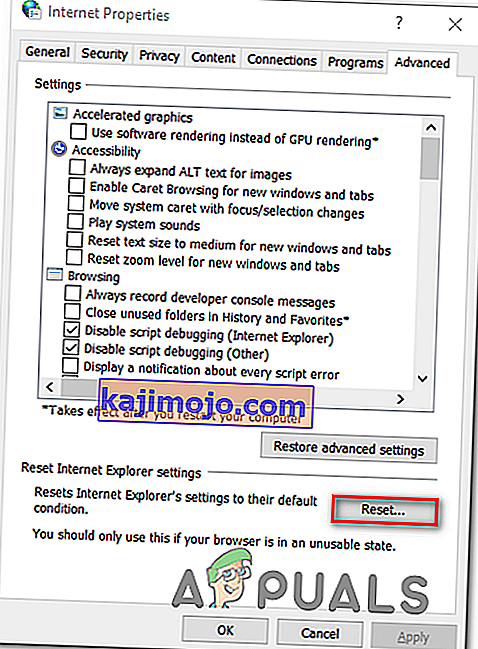
- Once you see the confirmation screen, ensure that the box associated with Delete personal settings is checked, then click on the Reset button.
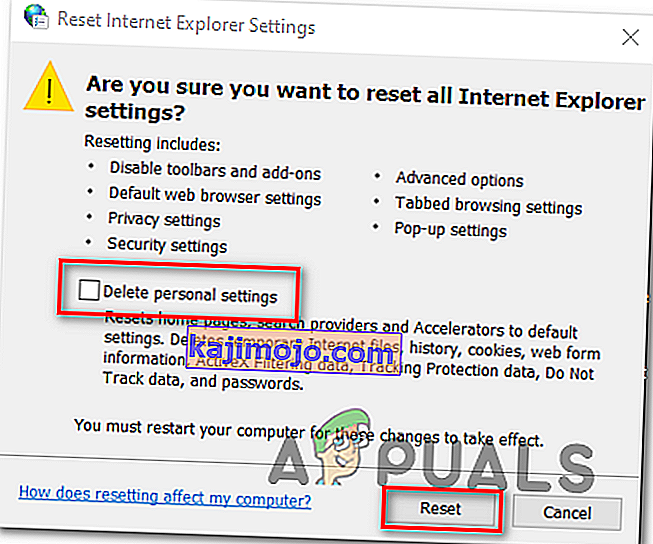
- Wait until the operation is complete, then restart your machine and see if the issue is resolved at the next computer startup.


In case the same “An unhandled win32 exception occurred in iexplore.exe’ error is still occurring, move down to the next method below.
Solution 5: Disable Script Debugging and associated Registry Keys (if applicable)
If you’re encountering the issue with Internet Explorer on a machine that has VS installed on it, the issue can also occur due when Script Debugging is enabled and the registry entries end up containing corrupted data.
Several affected users that encountered this issue have confirmed that the issue was resolved after they accessed the Internet Options menu to disable Script Debugging and then deleted the associated keys using Registry Editor.
Here’s a quick guide on doing this in order to fix the “An unhandled win32 exception occurred in iexplorer.exe’ error:
- Press Windows key + R to open up a Run dialog box. Next, inside the text box, type ‘inetcpl.cpl’ and press Enter to open up the Internet Options menu. If you are prompted by the User Account Control (UAC), click Yes to grant administrative privileges.
- Once you manage to find yourself inside the Internet Properties screen, use the menu at the top to select the Advanced tab.
- Inside the Internet Properties screen, scroll down through the Settings menu and check the box associated with Disable script debugging (Internet Explorer).
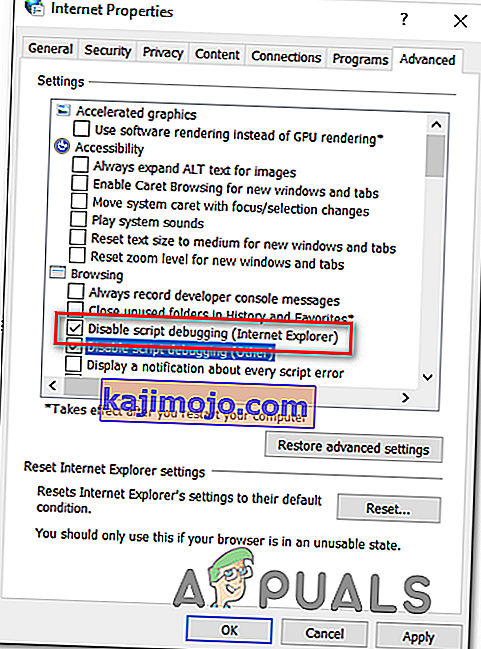
- Once the modification is enforced, hit Apply to save the changes, then close the Internet Properties window.
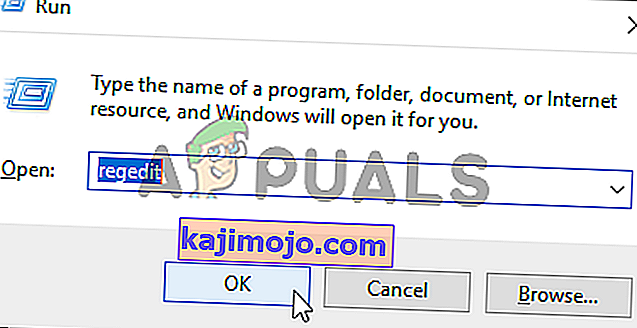
- Press Windows key + R once again to open up another dialog box. This time, type ‘regedit’ and press Enter to open up Registry Editor. You will need to grant admin access, so click Yes when prompted by the User Account Control window.
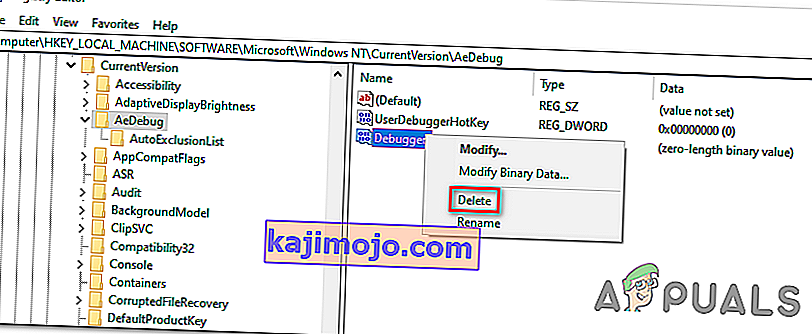
- Inside the Registry Editor, navigate to the following location using the left-hand menu:
HKEY_LOCAL_MACHINE\SOFTWARE\Microsoft\Windows NT\CurrentVersion\AeDebug (32 - Bit Machine) HKEY_LOCAL_MACHINE\SOFTWARE\Wow6432Node\Microsoft\Windows NT\CurrentVersion\AeDebug (64 - Bit Machine)
Note: The location of the file we need to delete is different depending on the Windows version that you’re using. If you have a 32 – bit Windows version use the first location, else, use the second.
- Once you arrive to the correct location, move down to the right-section, right-click on Debugger and choose Delete from the context menu.
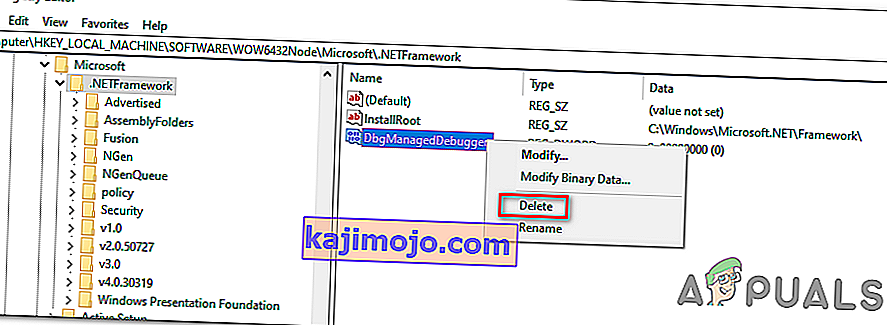
- Once this key is deleted, navigate to this second location:
HKEY_LOCAL_MACHINE\SOFTWARE\Microsoft\.NETFramework\ (32 - Bit Machine) HKEY_LOCAL_MACHINE\SOFTWARE\Wow6432Node\Microsoft\.NETFramework (64 - Bit Machine)
Note: Access the registry key associated with your Windows bit version that you’re using.
- When you arrive at the correct location, move over to the right-hand section and delete the DbgManagedDebugger value by right-clicking on it and choosing Delete from the context menu.
- After you manage to delete the value, close the Registry Editor and restart your computer.
- Once the next startup is complete, see if the same issue is still occurring.


In case the “An unhandled win32 exception occurred’ error is still occurring, move down to the next method below.
Solution 6: Install the Latest Version of NET Framework and Repair it
Having NET Framework installed on your computer is vital and plenty of modern games and programs depend on you having it installed. Before repairing it, follow the steps below in order to install the latest version on your computer.
Navigate to this link and click the red download button in order to download the latest version of the Microsoft .NET Framework. After the download has finished, locate the file you downloaded and run it. Note that you will need to have constant access to the Internet. Follow the instructions on-screen to proceed with the installation.
- After installing the latest version, it’s time to check its integrity. On your keyboard, use the Windows Key + R key combination to open the Run dialog box.
- Type in control.exe and click OK in order to open it.

- Click the Uninstall a Program option and click Turn Windows features on or off. Make sure you locate the .NET Framework 4.x.x entry and make sure it’s enabled. ‘x.x’ marks the latest version available for your operating system.
- If the checkbox next to .NET Framework 4.x.x is not enabled, enable it by clicking the box. Click OK to close the Windows Feature window and reboot the computer.

- If .Net Framework 4.x.x is already enabled, you can repair .Net Framework by clearing the box and rebooting the computer. After the computer has restarted, re-enable .Net Framework and restart the computer again.
Solution 7: Perform a Clean Boot
There are various other programs and services which can affect the proper functionality of the Microsoft .NET Framework suite. In most cases, the cause is the antivirus you have installed and you can try disabling it to see if the error persists. However, to make sure nothing can interfere with the installation, we recommend you perform a clean boot which will disable all non-Microsoft programs and services from starting up. This way, you can easily deduct just which program causes this error to happen!
- Use the Windows + R key combination on your keyboard. In the Run dialog box type MSCONFIG and click OK.
- Click on the Boot tab and uncheck the Safe Boot option (if checked).

- Under the General tab in the same window, click to select the Selective startup option, and then click to clear the Load startup items check box to make sure it’s not checked.
- Under the Services tab, click to select the Hide all Microsoft services check box, and then click Disable all.

- On the Startup tab, click Open Task Manager. In the Task Manager window under the Startup tab, right click on each startup item which is enabled and select Disable.

- After this, you will need to perform some of the most boring processes and that is enabling the Startup items one by one and restarting your computer. After that, you need to check whether the problem appears again. You will need to repeat the same process even for the Services which you have disabled in Step 4.
- Once you locate the problematic startup item or service, you can undertake action in order to solve the problem. If it is a program, you can reinstall it or repair If it is a service, you can disable it, etc.
Solution 8: Use SFC to Scan for Memory Leaks
It has been reported that the Microsoft .NET Framework corruption is related to faulty system files. These problems are rooted deep inside the system files and the only way to try to resolve them is by running the System File Checker (SFC). It will scan your system files for errors and possible repair or replace them. Follow the steps below in order to do so!
- Search for “Command Prompt” by typing it either right in the Start menu or by pressing the search button right next to it. Right-click the first entry which will pop up as a search result and select the “Run as administrator” context menu entry.
- Additionally, you can also use the Windows Logo Key + R key combination in order to bring up the Run dialog box. Type in “cmd” in the dialog box which appears and use the Ctrl + Shift + Enter key combination for admin Command Prompt.

- Type in the following commands in the window and make sure you press Enter after typing each one. Wait for the “Operation completed successfully” message or something similar to know that the method worked.
sfc /scannow
- Try to restart your computer and check to see if the Unhandled Exception has Occurred in your Application error continues to appear on your computer.
Solution 9: Performing a Clean Install
If none of the methods presented below have managed to help you in resolving the issue, it’s very likely that you’re dealing with some kind of Windows inconsistency that cannot be resolved conventionally.
If this scenario is applicable, you should be able to fix the issue by resetting every component associated with your Windows installation. If you want to go this route, you have two ways forward. It all boils down to the procedure that you want to follow:
- Repair install (in-place repair) – This procedure is the best approach when you need to refresh every OS component, but some users might end up considering it a little too tedious for their taste. Keep in mind that you will need a compatible installation media in order to enforce this fix, but the major advantage is that all your personal data (including games, applications and personal media) will be preserved even if you don’t back up your computer.
- Clean install – If you’re looking for the simplest solution, this is the way to go. You will not need an installation media to enforce it (it’s all done through the Windows GUI). But unless you back up your data in advance, be prepared for total data loss.