A Nord VPN a VPN-világ egyik régi szereplője, és Windows-alkalmazását a PC-világ legjobbjai között tartják számon. A Nord VPN nagyon változatos, ha funkcionalitás és rugalmasság szempontjából beszélünk róla. A platformokon átívelő támogatás mellett különböző szerverek is vannak különböző országokban, amelyek közül választhat.

Annak ellenére, hogy az alkalmazás meglehetősen hosszú ideig volt a piacon, a felhasználók arról számolnak be, hogy nem tudnak csatlakozni a Nord VPN-hez. Vagy leáll a kapcsolat a potenciális frissítés után, vagy a DNS-kiszolgálókhoz intézett kérés vagy „időkorlátos” választ ad vissza.
Mi okozza a Nord VPN nem csatlakozását?
Mivel a VPN a számítógépes rendszer teljes internetes architektúráját használja, számos oka lehet annak, hogy a Nord VPN nem tud megfelelően csatlakozni. Ezek közül néhányat az alábbiakban sorolunk fel.
- IPv6: Úgy tűnik, hogy a Nord VPN egyik kommunikációjában sem támogatja az IPv6 protokollt. Tehát ha ez engedélyezve van, akkor előfordulhat, hogy nem tud csatlakozni.
- Harmadik féltől származó programok: A harmadik féltől származó programok köztudottan ütköznek a szoftverrendszerrel, és versenyeznek az erőforrásokért; ezért nem megfelelően csatlakozik.
- Hálózati adapter: Mivel a Nord külön hálózati adaptert használ az internettel való kommunikációhoz, előfordulhat, hogy a hálózati adapter nem működik megfelelően, és újra kell indítania.
- Hiba a hálózatban: Néha előfordulhat, hogy a számítógép hálózati konfigurációi olyan hibaállapotban vannak, amely egyáltalán nem okoz kapcsolatot. Megpróbálhatjuk ebben az esetben az összes változó frissítését.
Mielőtt elkezdenénk a megoldásokat, meg kell győződnie arról, hogy az internet valóban működik-e . Ha az internet nem működik megfelelően, a Nord nem képes megfelelő kapcsolatot létrehozni és hozzáférést biztosítani az alagút hálózathoz.
Győződjön meg arról, hogy magánhálózatot használ (nem iskolai, munkahelyi vagy nyilvános helyeken, például kórházakban), és nincsenek meghatalmazottak. Miután kétszer ellenőrizte, hogy az internet megfelelően működik-e, folytassa.
1. megoldás: Az IPv6 letiltása
Az IPv6 (Internet Version Protocol 6) az IP legújabb verziója a számítógép hálózati architektúrájában. Alapértelmezés szerint továbbra is az IPv4-et használjuk, és még mindig nem tértünk át véglegesen az IPv6-ra. Lehet azonban, hogy vannak olyanok, akik megkezdték az IPv6 használatát az internetkapcsolathoz. Úgy tűnik, hogy az IPv6 nem működik megfelelően a Nord VPN-lel. Ezért letiltjuk és újra ellenőrizzük.
- Kattintson a jobb gombbal a tálcán található hálózati ikonra, és válassza a Hálózati és internetes beállítások megnyitása lehetőséget . Kattintson a beállításokban az Adapter beállításainak módosítása lehetőségre .

- Az illesztő beállításai között kattintson jobb gombbal a használt adapterre, és válassza a Tulajdonságok lehetőséget .
- Az illesztő tulajdonságai között törölje az IPv6 opciót, és ellenőrizze, hogy az IPv4 engedélyezve van-e. Változtatások mentése és kilépés. Indítsa újra a számítógépet, és ellenőrizze, hogy a hiba elhárult-e, és képes-e csatlakozni az Nord VPN-hez.

2. megoldás: Harmadik féltől származó alkalmazások ellenőrzése
Számos egyéb alkalmazás és program tűnik úgy, hogy ütközik a Nord VPN működésével. Ha egynél több alkalmazás próbál hozzáférni egy erőforráshoz, akkor versenyfeltétel lesz, és nem a várt módon működnek.

Fel kell hoznia a feladatkezelőt (Windows + R és 'taskmgr'), és ellenőriznie kell a háttérben futó összes alkalmazást. Az egyik ilyen alkalmazás, amely köztudottan problémákat okozott, a Glasswire Elite volt . A Nord VPN-hez való csatlakozáskor megpróbálja eltávolítani vagy letiltani.
Megjegyzés: Megpróbálhatja megtisztítani a számítógép indítását is. Ez letiltja az összes külső, külső gyártótól származó alkalmazást, és csak a szükségeseket indítja el. Most megpróbálhatja létrehozni a kapcsolatot. Ha sikeres vagy, ez azt jelenti, hogy valamilyen alkalmazás okozta a problémát. Az egyes alkalmazások engedélyezésével és újbóli ellenőrzéssel visszaléphet.
3. megoldás: A kiszolgáló helyének megváltoztatása
A Nord VPN lehetővé teszi a felhasználók számára, hogy kiválasszák a kiszolgáló helyét. Ezek a szerverek szétszórtan helyezkednek el az egész világon, és földrajzi elhelyezkedésüknek megfelelően biztosítják a kapcsolatot, vagyis egy hozzád közelebb eső kiszolgáló várhatóan gyorsabb lesz. Megpróbáljuk megváltoztatni a szerver helyét, amelyet megpróbál csatlakoztatni, és megnézzük, hogy ez megoldja-e a nem csatlakozási problémát.
- Indítsa el a Nord VPN-t, és kattintson az alkalmazás tetején található Szerverek fejlécre.

- Most válasszon egy másik kiszolgálót, mint korábban, és a kiválasztás után próbálja meg újra elindítani a VPN-t. Ha ugyanezt a viselkedést tapasztalja, próbáljon meg másik kiszolgálót választani, és tesztelje a hálózatot egy másik webhelyen.
4. megoldás: Indítsa újra a hálózati / TAP adaptert
A Nord VPN létrehoz egy virtuális hálózati adaptert a számítógépén, amelyet felhasználhat az információk közlésére. Hídként működik, amelyben az Nord VPN módosítja a beállításokat, így kezdeményezheti és fenntarthatja a VPN-kapcsolatot. Néha ez hibaállapotba kerül, ami miatt nem csatlakozik a VPN-kiszolgálóhoz. Megfelelően újraindítjuk az adaptert, amely biztosítja, hogy az összes konfigurációja újrainduljon.
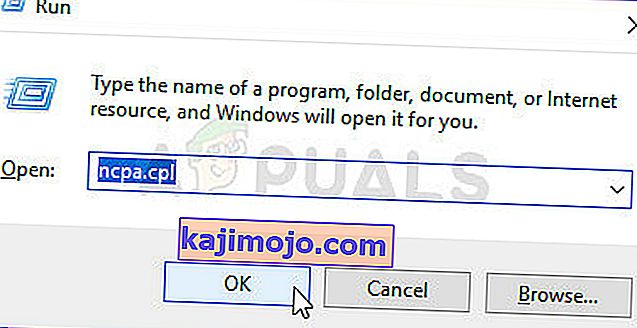
- Nyomja meg a Windows + R billentyűkombinációt, írja be az „ ncpa ” parancsot. cpl ” elemet a párbeszédpanelen, és nyomja meg az Enter billentyűt.
- Az összes hálózati adaptert felsorolja Ön előtt. Válassza ki a TAP adaptert, kattintson rá a jobb gombbal, és válassza a Letiltás lehetőséget .

- Miután kikapcsolta, várjon egy percet. Ezután kattintson a jobb gombbal újra, és válassza az Engedélyezés lehetőséget . Most próbálja meg csatlakoztatni a Nord VPN-t, és nézze meg, hogy ez sikerül-e.
5. megoldás: Hálózati verem öblítése
Számtalan példa van arra, hogy a számítógép hálózati veremének öblítése (frissítése) megoldja a különböző VPN-hez kapcsolódó problémákat (beleértve a Nordot is). Ez a folyamat törli a DNS- és IP-beállításokat, és győződjön meg arról, hogy nincsenek helytelen beállítások, amelyek ütközhetnek az alkalmazással.
- Nyomja meg a Windows + S billentyűt, írja be a „parancssor” parancsot a párbeszédpanelbe, kattintson a jobb gombbal az alkalmazásra, és válassza a Futtatás rendszergazdaként lehetőséget .
- Ha egy megemelt parancssorban van, hajtsa végre a következő parancsokat egyenként, majd az Enter billentyűt minden parancs után:
ipconfig / release ipconfig / flushdns ipconfig / uu netsh winsock reset netsh interface ipv4 reset netsh interface ipv6 reset netsh winsock reset catalog netsh int ipv4 reset reset.log netsh int ipv6 reset reset.log

- Now close the command prompt and try launching Nord VPN again. Check if you can connect with it properly.
Solution 6: Reinstalling Nord VPN (along with the TAP adapter)
If all the above methods don’t work, you need to make sure that your Nord installation is proper and there is nothing wrong with the installation files. The TAP adapter will also be reinstalled in the process because Nord VPN manages the adapter and it is only for its use. Make sure that you are logged in as an administrator. If reinstalling doesn’t work, make sure that your credentials are correct which you are entering the services have not expired.
- Press Windows + R, type “appwiz.cpl” in the dialogue box and press Enter.
- Once in the application manager, search for the entry Nord VPN from the list, right-click on it and select Uninstall.

- Now restart your computer and download the application again from Nord VPN’s official website. Now after entering your credentials, try connecting again and check if you can establish the VPN connection correctly.
Solution 7: Using an Alternative VPN Service
There are numerous VPN clients out there in the Windows market. However, we recommend or readers to try CyberGhost. This VPN service is as simple as it gets and also provides you with servers located at different countries. It even has separate VPN servers for streaming Netflix and BBC with ease. Follow the steps below to download the application and get your connection secure in no time.
- Download CyberGhost from (here).

- After downloading the VPN, install it on your computer. You might be asked for proper permissions. Make sure that you are logged in as an administrator and press Yes to all the permissions asked.
- After CyberGhost is installed on your computer, launch it. Here you will see a list of different servers available along with the distance from your actual location (more distance means slower internet).

- After selecting the server, click on the power button present at the right-hand side of the application. You can also select dedicated servers for torrenting and streaming (present at the left navigation pane).
Solution 8: Disable Firewall
In some cases, the default Windows Firewall might be preventing the application from working properly. Therefore, in this step, we will first be allowing it through the Firewall and make sure that it isn’t blocked by the Firewall and then we will also make sure that Windows Defender has it added as an exception. For that:
- Press “Windows” + “R” to launch the Run prompt.
- Type in “ControlPanel” and press “Enter” to launch the classical control panel interface.

- Click on the “View by:” button, select “Large Icons” and then click on the Windows Defender Firewall option.
- Select the “Allow an app orfeature through the Firewall” button on the left pane and then click on the “Change Settings” button and accept the prompt.
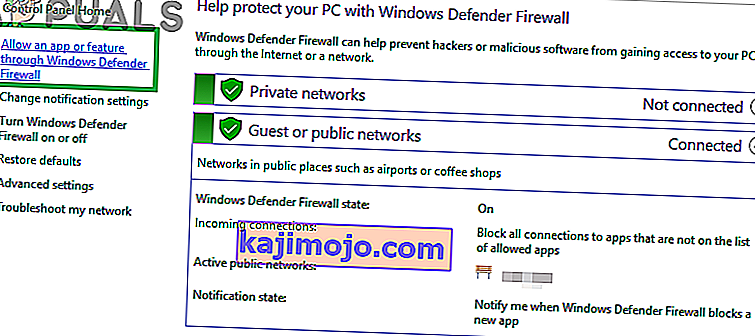
- From here, make sure that you check both the “Public” and the “Private” options for Nord VPN and its related applications/drivers.
- Save your changes and exit out of the window.
- After that, press “Windows” + “I” to launch the settings and click on the “Updateand Security” option.
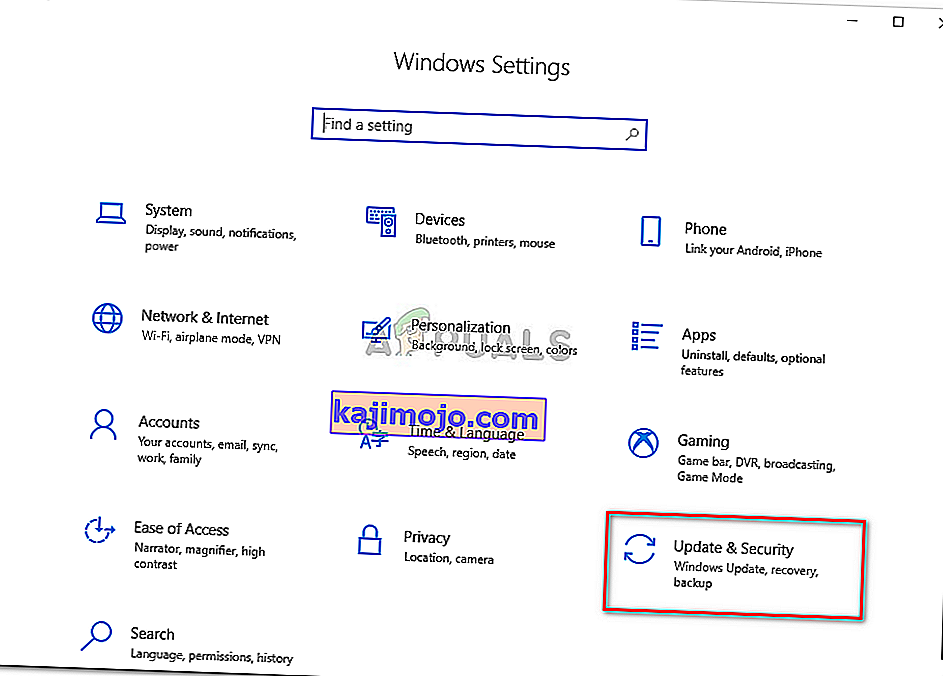
- From the left pane, click on the “Windows Security” button and then click on the “Virus and Threat Protection” button.
- Select the “Manage Settings” button under the Virus and Threat Protection Settings heading.
- Scroll down and click on the “Add or Remove Exclusions” button in the next window.
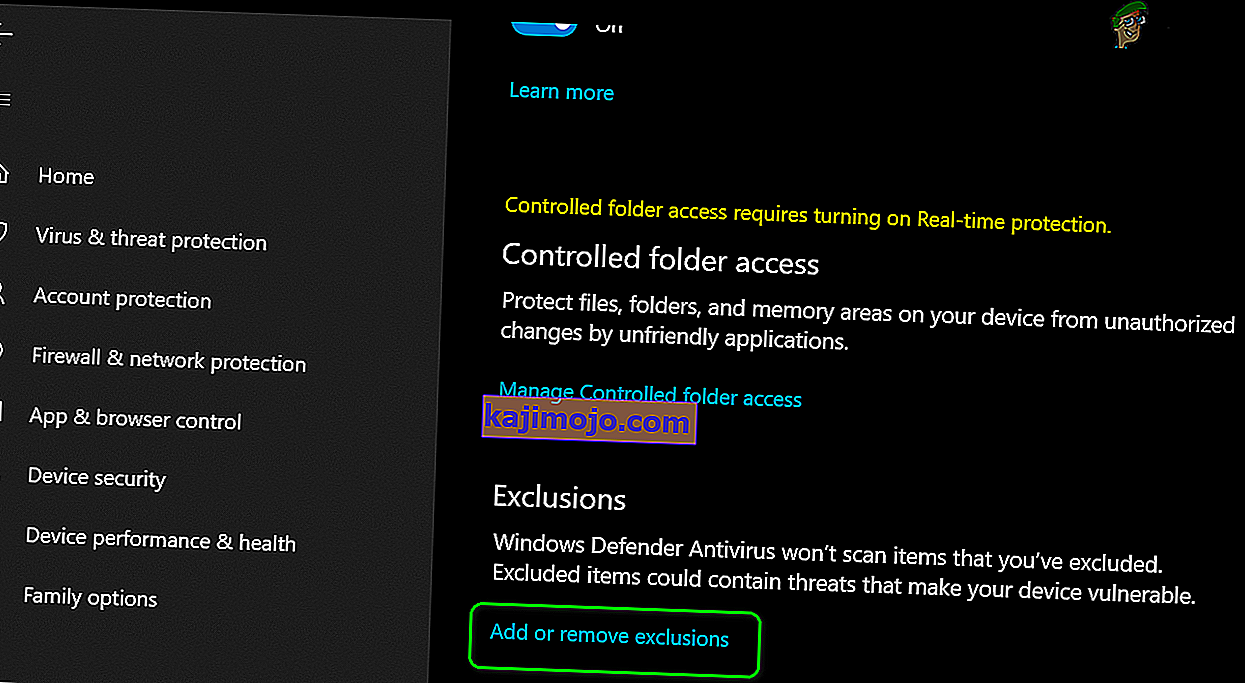
- Click on the “Add an Exclusion” option and select “Folder’ from the File type.
- Make sure to specify the Nord VPN folder and exit out of this window after saving your changes
- Check and see if doing so has fixed the issue with Nord VPN not connecting.


Solution 9: Change NordVPN Protocol
It is possible that Nord VPN might be running into issues while trying to connect to its servers due to the protocol configuration in its settings. If one type of protocol isn’t working for you, it is always recommended to try and switch to the other protocol to make sure that the issue isn’t tied to the wrong selection of the protocol type automatically or manually. For that:
- Launch NordVPN and make sure to disconnect from any currently active sessions.
- Click on the “Gear” icon on the top right corner and go into the settings.
- Click on the “Advanced” option from the left-hand side menu.
- Click on the “Protocol” dropdown and check on “TCP”.
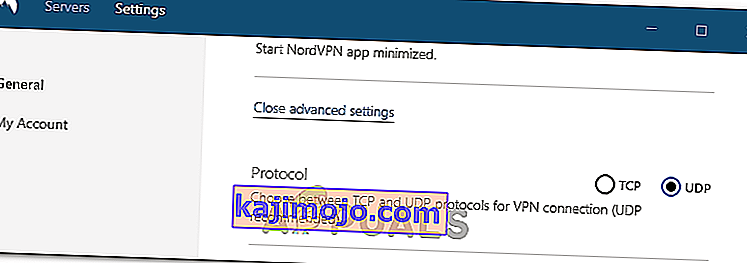
- This should change your protocol from TCP to UDP.
- Check to see if doing so fixes the issue for your computer.
- To Verify that none of the protocols work, make sure to repeat the steps and select “UDP” instead of TCP and then check again.
- If none of the selected protocols are able to make a connection with the server, move on to the other fixes.

Solution 10: Changing DNS Server Configuration
DNS Servers are used by the computer to establish a stable and secure internet connection with other sites on the internet, however, if the computer is unable to detect the DNS settings properly, or if the selected DNS server is facing outage, Nord VPN might not connect properly. Therefore, in this step, we will be changing the DNS configuration to ensure that DNS isn’t an issue. For that:
- Press “Windows” + “R” to launch the Run prompt.
- Type in “ncpa.cpl” and press “Enter” on the keyboard to launch the network configuration panel.
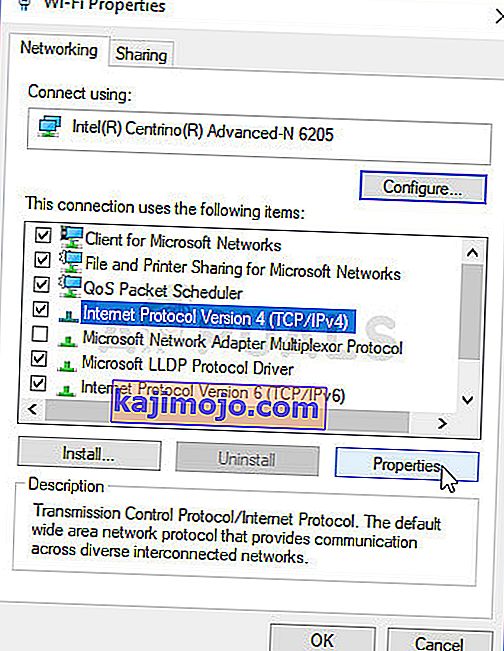
- Right-click on your internet connection and select the “Properties” option.
- Double click on the “Internet Protocol Version4 (TCP/IPV4)” option and check on the “Use the following DNS addresses” button.
- At first, type in “8.8.8.8” and “8.8.4.4” in the primary and the secondary DNS addresses field respectively and click on “OK”. After that, check to see if NordVPN is connecting, if it isn’t, try to use “103.86.96.100” and “103.86.99.100” in the primary and the secondary fields respectively.
- Check to see if you are able to make a connection by selecting those DNS servers.


Solution 11: Opening Ports
For some people, the issue might arise if the ports that NordVPN uses to communicate with its servers are being blocked by your router. For security reasons most routers often block ports used by VPN/Network Tools to prevent any alterations to your connections and if that is the case, we will have to open the ports by logging in to the router’s control panel. For that:
- Press “Windows” + “R” to launch the Run prompt and type in “cmd” and then press “Ctrl” + “Shift’ + “Enter” keys on your keyboard to provide admin permissions.

- Type in the following command in the command prompt to list the IP information.
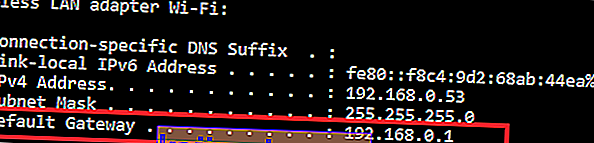
ipconfig /all
- The computer will list all the information of the network adapters connected to your computer.
- Under the default gateway option, after the mac address, there should be an IP address that should look something like “192.168.x.x”.
- Copy this IP address and launch your browser.
- Paste the IP address within a new tab on the browser and press “Enter” to navigate to the browser’s login page.
- Once on the login page, log into the control panel with your credentials, both of which, i.e the username and password should be written on the back of your internet router. If not, then the username should be admin and the password should be the Wifi password that you use to connect your devices.
- After logging into the Control panel, look around for a “NAT” or “Port” option that allows you to forward ports.
- Type in “500” and select “UDP” from the list.
- Click on “Save” to forward the 500 UDP port and exit out of the control panel after the change has been made.
- Try connecting with Nord VPN and check to see if the issue persists.


Solution 12: Use Hotspot
Mostly, this error can be fixed simply by employing your mobile’s hotspot connection instead of the Wifi or the Wired connection that you are already using on your computer. This does seem an inconvenience for Data conscious people but it seems to be the only way some people are able to connect through Nord VPN as some routers block it completely.
Note: In addition to this, you can try to change the firmware on your router to avoid any permanent blocks put from the router or to eliminate any bugs with the connection.